Tuesday, December 29, 2009

Christmas Card?

First I hope you all had a Merry Christmas and are getting ready for 2010. I'm sure you are wondering why I am posting a card  for Valentine's Day when it is titled Christmas Card?  Well, I "received" a Score Pal for Christmas as part of a gift certificate, so I thought this card may count sorta as Christmas.

I made this card using the Score Pal for the embossed lines around the edge of the card.  I am sure that most of you have used a Score Pal or own one, but if you would like to see what they are all about, you can see them at http://www.scor-pal.com/.  I have been pretty stubborn about buying one for quite some time.  I have been using an old cutter with an embossing tool.  I have to say this was so much easier and accurate that the old way.

The cuts were made with my Cricut.  I was originally going to use the heart with love cut from Paper Pups until I realized that I had leant the cartridge to a friend.  So I used Cricut Design Studio and welded the silhouette heart from George with the Love from Home Accents cartridges.  I then cut the flowers from George.  The white flower centers & the white dots were done with a white Sakura Souffle pen. 

I am making these cards for Cards for Soldiers.  The link to that thread is here on the Cricut.com message board.  The cards are made for our soldiers to send to their loved ones back home since they have limited access to a card shop.

Friday, December 18, 2009

GO COLTS


I'm having a Dad moment.  The Dad moments are what Susan & I lovingly refer to as that "should take 5 minutes, 3 hours later you have it done" projects.  Sometimes the Dad moments involve running out for parts you don't anticipate needing, or you have things that don't fit together, or something gets broken while working on the project.  These moments can happen anytime and I'm sure you all have them, but probably use another name.  Mom doesn't understand these moments and very rarely do they happen to her.  Susan & I however have them happen often.

That said, the tree above is my Dad moment this morning.  My son got on the bus at 6:41 AM this morning.  I came back to post this right then.  I had my extension cord ready to go.  Thought that I would plug it in behind my son's bass.  No such luck, the plug was too big to plug into the socket by the closet Dad built for me.... huh.  Not enough room between the socket & closet.  At this point I realize this is going to be a Dad moment that Dad is indirectly involved in.  Dad, if you are reading this, I love you and love the closet.  So now I must plug in under the computer desk.  No problem there is a plug open in the surge protector, I just have to unplug the shredder.  After unplugging the monitor and the shredder, I realize there really isn't enough room on the surge protector for the plug here either.  When did I buy this thing?  And no I'm not going out to buy a different cord.  I am starting to feel like the dad in the Christmas Story at this point & am wondering what fuse is going to blow.  Then I see that there is a completely open plug on the wall.  As my son would say "DUH".

At this point I am getting a little frustrated, but I still haven't had to go to the store to buy a new cable.  I hook up the tree and plug it in, the lights work - what luck.  Now I need that little piece of Colts material in the drawer of my sewing machine cabinet.  A few drawers later I find the elusive piece of material and while trying to close the drawer I catch my finger.  A little cussing, but I don't think it's broken.  I am however getting a lovely bruise by my fingernail.  Geesh! 

Somehow, the material wraps around at just the right point to see clearly the Colts & Helmet.  How did that happen.  On to pics.  These new blue LED lights don't photograph very well.  Way too bright.  So I took several shots with different settings on my camera before I figured out what would work.  I better write it down for next time.

It is now almost 8:15 AM.  So on to some details. I used the football cut on the Sports Mania cart for the footballs.  I was really happy with the way they turned out.  It really helped to put in a new blade and I used a new mat.  They are cut at 1.5", but even the little threads cut without tearing. I copied the helmet images, printed & cut them out.  The tree topper is an antenna topper for cars.  I thought it worked out to use it as a star.  My son & I are huge Colts fans - Yeah Colts last night against the Jags - so we thought we needed a little blue for Christmas this year.

As many of you know I hate to journal so I will be printing this post for my scrapbook with the picture of the tree.  That should only take two weeks to figure out and finish.


Thursday, December 17, 2009

Fuzzy ATC


And finally, this is my Fuzzy ATC.  In another swap, the theme this month was 'fuzzy'.  So we had to do something fuzzy.  Seems easy enough until you have to come up with something.  This is my take on a brown fuzzy reindeer under a tree.  NO?  Ok, this is what I ended up doing after a few other great ideas rolled around in my head.  Doesn't everyone do that?

I used plain white cardstock for this ATC, although I think I always use white cardstock, so nothing surprising here.  I used one of the oldies, but goodies, Christmas Cheer Cricut cartridge.  I have always really loved this particular stocking from that cart.  I cut the card and border from George and the stocking from Christmas Cheer.  I ran the border through my Xyron and rubbed Sour Apple Green Fun Flock on it.  The stocking was cut as a whole piece, then I cut just the top of the stocking out by themselves. The toe was cut with my Crop-A-Dile instead of the Cricut. I ran the stocking through the Xyron and stuck the top & toe on and then rubbed the rest of the stocking with Snow Cone Blue Fun Flock.  After that I cut just the top of the stocking out on my Cricut, Xyron'd and rubbed it with Pixie Pink Fun Flock, ran it through the Xyron on the other side and stuck it on the top of the stocking.  I cut another set of toes and did the same process for the toes at the tops. A lot of flocking, but they are fuzzy.

I used my Quikutz Polka Dots embossing folder on the background. they put the whole thing together.  Yikes, it sounds harder than it was.  Anyway,  I thought they were kind of a cheerful looking and very fuzzy.

I don't think these have been posted on PaperockScissors blog yet, so don't tell.

The Christmas ATC


This is the traveling Christmas ATC for the Be Inspired ATC swap on the Cricut message board.  Our group did a traveling ATC where each member of the swap added a little something to the card, (one for everyone) and then we all had a card that had a little of all of us added.  You can see the progression of the card here.

Sherrie has quite a story to go along with the travels of the cards and you can see how everyone added to it.  It is amazing that we all had the same idea of where to take the design.  I added the reindeer from Christmas/Noel Cricut cartridge as my contribution.  I did cut the antlers off as they just wouldn't cut that small, so it became a doe instead of a buck.  At least that's what I was thinking.

I am going to put a jump ring on it and turn it into an ornament for my tree.  It will be stored with my 'special' ornaments.  Thanks to all the gals that were in the swap.

Final Be Inspired ATC

Well the Be Inspired ATC swap is coming to a close.  It has been a fun swap, very challenging to come up with ideas each month based on a picture.  You can see the ATCs on the Cricut Message Board here.  Most of the cards are shown on the first page & then the rest are posted on the last pages of the thread.


This is my take on the picture of the chair.   I wanted to use a technique called felting from a recent Split Coast Stampers Weekly Inkling.  The tutorial is here.  They have a great video that shows how to do the technique.  I used some old race napkins I had laying around to match the black & white in the picture.  I liked trying something new, but I have to say that it would have been a lot easier & faster to run the napkin through my Xyron instead of messing around with ironing the saran wrap.  It takes a lot for me to find the ironing board, let alone use the iron.  Anyway, when it is ironed on, it has the feel and look of printed felt.

I used a stamp from a Making Memories foam stamp set, Floral/Dingbat with Making Memories Buttercup paint.  I've had this set of stamps for a while so it was good to finally use them.

I had the red snaps in my stash & they seemed to finish off the card.  I had some problems placing the snaps until I remembered that there is a guide on my crop-a-dile to keep them all even from the edge of the paper.

I've really enjoyed this swap and all of the really creative ideas that have come through.  I will miss it.

Thursday, December 10, 2009

Blue River Big Band

Just popping in to say thanks to you all for following my blog.  It is really very much appreciated.

I still have quite a bit to do to dress this blog up - a lot.  I have been busy working on some projects, but can't post until they are posted for the swaps.  Hopefully next week.

In the meantime, Susan has been doing some research online and found a wonderful website. Our Dad is a musician and is a member in a few jazz/big band bands.  One band that he is in is called Blue River Big Band - the link is here or it is listed under my favorite websites to the right.  Please check it out if you have a chance.  We are so excited that the group has two CD's and has made You Tube.  Whooda thought Dad would be the one in the family to be the first on You Tube.  He is the sax player pictured on the main page and we are very proud of him.

Sunday, November 29, 2009

Christmas Gift Card Holders

 I finished these gift card holders at the last minute yesterday morning for our family Christmas gift exchange.  No, you didn't miss Christmas, we just did it a little early this year.  I borrowed Susan's Sports Mania cart for the golfer and golf tee.  I am always surprised by the huge number of choices on each Cricut cartridge.  I cut a golf ball too, but couldn't figure out how to fit it on the card - I'll save it for later.  I also used some Basic Grey papers I have been hoarding for a while. I love their papers, buy them then have a hard time using them, because I love them so much.


I used dark blue paper that I ran through the Cuttlebug using a Fiskars embossing plate.  Not the most exciting creation, but it worked.  The brads are from Making Memories.  I've had them around a long time & asked Robert to give them back to me so I could use them again.  He's a teenager, he thought I was just being weird.


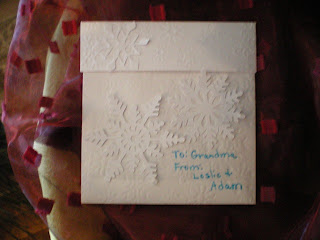
I used the "When it's Cold Outside" cart to make Mom's holder.  I cut the snowflakes out of a single piece of white cardstock to use as a template to sprinkle powdered sugar over a pumpkin roll I baked for Thanksgiving.  The top snowflake was from another project.

If you get a chance to really look at "When it's Cold Outside", you can see how really clever the snowflakes are.  These were simple, but the majority have hidden items that make up the snowflake.
For Jessica's holder, I used a cut from the "Christmas Cheer"cart.  I saw this tag idea in PaperCrafts Magazine and really liked the idea of Santa's jacket on a hanger.  I used Snow Writer for the white areas on the jacket.  It was a little different than I had expected, kind of sandy, almost like grout rather than fluffy snow.  It still turned out OK though.

I hope you had a great Thanksgiving and thanks for stopping by.

Thursday, November 26, 2009

Mom's Christmas Cards


I finally finished the Christmas cards I made for my Mom & Dad for Christmas.  I have been trying to make cards for them to send every year.  I think I missed last year...

I used white and blue cardstock.  The stamps are Hero Arts Clings - Snowflake Circle & Stampendous - Cling Snow Brackets.  They are stamped with Sky Blue Color Box Pigment Ink and embossed with Ranger Holographic Embossing Powder.   The extra snowflakes were cut on Cricut, stamped & embossed the same as the snowflake stamps.

I have to thank both my friend Joyce & my sister Susan for putting up with my glitter embossing addiction.  Although Joyce found it easier to vacumn after I left her house because she could see where she had already swept.  Susan will probably never get the glitter out of her kitchen.  I had a little dropping problem.  Needless to say she & the kids all will be glittered for a while.

The card is an easel card from SplitCoastStampers.  I'm really sorry I can't give credit where credit is due, but I can't find the link.  It is an A2 card creased at 4-1/4" & 2-1/8".  I placed small snowflake buttons/embellishments to hold the card open with glue dots.

Tuesday, November 17, 2009

Star ATC

Wow, two posts in one day.

I created this ATC card for a swap also on the Cricut Message Board. There are a lot of very talented, creative ladies participating in this swap. You can see all the ATC's for the month of November at  Karen's Blog.
I used Cricut Design Studio to cut the ATC with the star shape inside. The whole piece is 2.5" x 3.5" with the star cut at 2".
I actually used only paper I had in my huge collection. There are 5 different patterned papers for the star using Iris Folding. The pattern for the iris folded star was at Handcrafted Greetings. Judy Headrick has for or five different iris folding shape designs in .pdf format to download. It makes it very easy to do the folding since the shape & math is already done for you. I do have to admit that this was a very tiny pattern and I used an entire Quickie Glue Pen completing 14 ATCs, but I was very happy with they way the turned out.
I apologize for the links showing as links. I need to spend a little time experimenting with that so that it shows as a word instead.... Hummmm.

Lime with Lace


I've been at it again. I worked on this card this weekend during a mini-crop at a friends house.
This is for the Card of the Month swap on the Cricut messageboard. The "challenge" for the month of December is Lime with Lace. I'm posting a little early because I actually have them done way ahead of time, very different concept for me.
I was excited to have a reason to purchase this paper. It is green, my favorite color, and the spirograph design took me back a little. The paper is by KaiserCraft, Spirograph P347 Rosette. I couldn't resist. I purchased the P344 Spiro paper too. They have great second sides on both papers so don't forget to take a look.
I am guessing that a few of you remember trying the spirograph kits years ago. I couldn't get a completed design to save myself, so I think this paper is letting me cheat a little. I think my parents still have the kit somewhere in the basement of their house. Maybe I should take a look and see if I could complete a design now - huh.
Anyway, the lace part of the card was punched with a Fiskars boarder punch. I choose the Effervescence Border Punch. I don't buy a lot of border punches, but I thought this could be used for more than just a lacey border.
I was also lucky that my sister forced me to take a look at the $1 rubber stamps at Michael's last week. I found the perfect spirograph flowers. The stamp is by Janet Dunn for Studio G. For a $1 I thought I got a great deal.
The finished card is 4-1/4" x 5-1/2".

Wednesday, January 28, 2009

C.O.M. - Cricut.com


I am testing the waters here. I have a lot of work to do to get the pictures clear. I think this one will be OK, since I'm not supposed to post it until the swap month is over. Hopefully, noone will see.
This card is 4-1/4" x 5-1/2". I used K I Memories 2753 Daisy Doodle paper. It somehow had the pattern on one side & the mint color on the back. How lucky was that.
The mosiac squares are from Amanda Blu, stamped with StazOn Opaque White ink. The stamps are from Close to My Heart - Friendship Word Puzzle set. I won the set as a door prize at a local Cricut Swarm and finally got to use it. The ribbon is from American Crafts. It was really nice heavy ribbon, by the way.
The cut out was done on my Cricut with Design Studio. My sister originally sent the cut file to me & I moved things around a little. I'm sorry I can't tell you where the original idea for the cut file came from. It is done with the brackets from the George cartridge.
I almost forgot that I used Eucalyptus Stickles on the centers of the flowers. I can't believe I forgot, I love Stickles.
Well, I hope you all like it and thanks for taking a look. I am going to have to do some testing on the photos so that you can see everything better next time.